Making In my Dreams We travel in Boats - page 3

©2008 Judith Hoffman

1  |  2  | 3


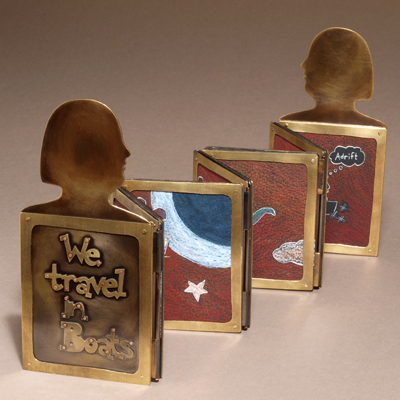
In my dreams We travel in Boats ©2008
9. Drill holes in the four corners for the rivets. A jig made of scrap wood helps to keep everything lined up. After drilling one hole, put a rivet through the hole, drill a second hole in the opposite corner. Put another rivet in that hole. These two rivets keep things from moving while drilling the other two holes. I used the plastic scraper to lift the stack of pages after the holes were all drilled.

I’m using rivets handmade from brass wire. Luckily I have a bunch left from another project.

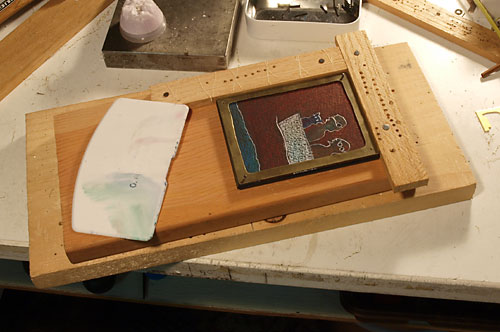
9. Use a jig to hold the page parts while drilling holes in the four corners.
10. Start assembling the guts – the inner brass pages – and the hinges. It would have been easier if I had started with these and made everything to fit them.

I'm careful to keep the lower edges as straight as possible so the book will stand okay. There is a strip of brass between the two hinged pages that is my spacer.

You can see the long copper tubing that is holding the three hinge pieces together. At this stage it's easy to pull that out to dis-assemble the book. Later it will be trimmed and flared to lock it in place.

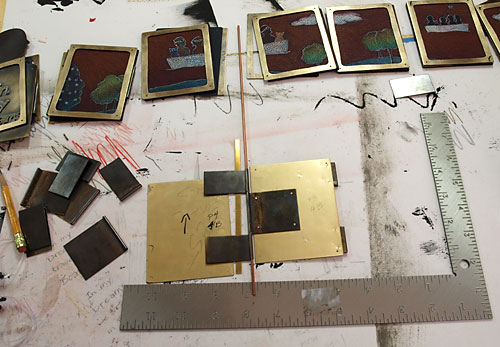
10. Start assembling the "guts" of the book.
11. The "guts" of the book are finished. You can see where I've carefully numbered everything to keep it all in the right place. The holes wouldn't line up if I put the other page parts on the wrong inner brass page.

One of the tubing pieces has not been trimmed to size yet.

This is an exciting point for me. I know the pages will stand okay when assembled, now I just have to do all the rivets.

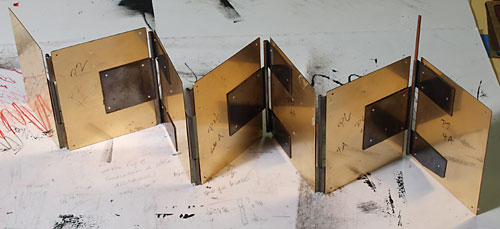
11. The "guts" are finished. I had to photograph this - it's not attractive, but it works!
12. After the hinges are riveted to the inner brass pages, I pull out the inner tubing and start assembling the layers. In many of the pages I have to trim down the drawings or the liner museum board. Nothing fits perfectly, but it’s not too bad.

You can see the parts for the cover in the foreground. The shiny brass page with the tubing section riveted on will be hidden. The white piece of museum board next to it has a spacer cut out to accomodate the hinge. This way each inner page will be flat and will provide a better surface for the drawing to rest on.

Every part has a number and a letter to indicate it's position in the book.

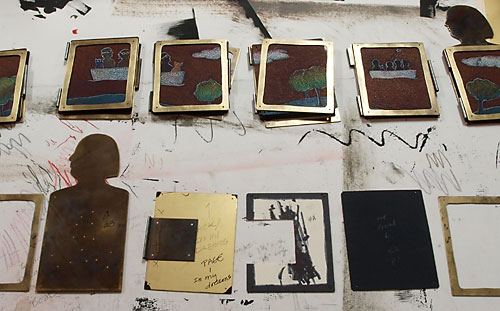
12. Ready to rivet all the parts together.
13. After all the pages and the covers are riveted together, I put the tubing in the hinges and flare each end a little to hold the tubing in place. To make the flare I put pliers with round tips in the end of the tubing and twirled them around, then hammer with a small punch.


PAGE: 1  |  2  | 3

Blog entry about this book.
Web page for this book.

13. The book is assembled. This is the back view.
home galleries blog tutorials open studios
about links what's new contact