 |
Making In my Dreams We travel in Boats - page 2
©2008 Judith Hoffman
1 | 2 | 3
|

In my dreams We travel in Boats ©2008
|
NOTE: To avoid injury be sure to observe safety rules. When drilling, wear eye protection. Never hammer the end of a screw driver or wooden handled tool to make holes. Be aware of the safety precautions necessary for the tools you use.
4. Start cutting out the metal parts. The cover is cut out first because it determines the page size. (See one cover in the next image.) Then I cut 24 gauge pages - thinking they would be etched and riveted back to back. To the right is my metal shear. I use a squared off piece of Davey board (the grey material) as a spacer. Once it's taped in place I can cut multiple pieces of metal to the same size. |
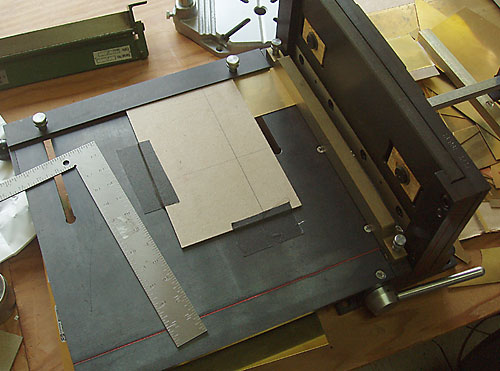
4. Start cutting the metal pages.
|
5. All the drawing tests are still spread out on my worktable. As I look at the metal pages and the paper drawings, I think maybe I would like a metal border with drawings inside. This would help to protect the pencil drawings.
Make a test border in metal. When I put it over my test drawings, I think "yes!" and don't bother to finish the test page. I love the brass with the colored pencil drawings on black paper.
Cut page frames in 20 gauge brass. Cut out inner frame by hand. Each inner frame takes about 10 minutes to cut out, there are 12. File edges, sand, color page frames. |
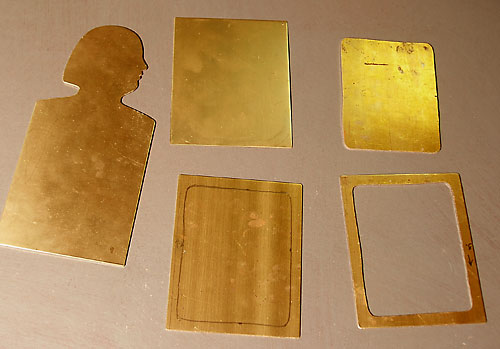
5. One each of all the metal parts. The part at the upper right is a scrap - nice shape.
|
| 6. To the right are all the parts necessary for one page. Beginning at the upper right: page frame, drawing (seen from the back), spacer for hinge, center metal page. Continuing from lower right: another spacer page, the drawing and the page frame. |

6. All the parts for one page.
|
7. All metal parts are cut out and colored with brass oxidizer. The words for the front and back are cut out, and riveted to their covers. Rub each piece with extra fine pumice for a soft shine and to bring out the words on the covers.
|
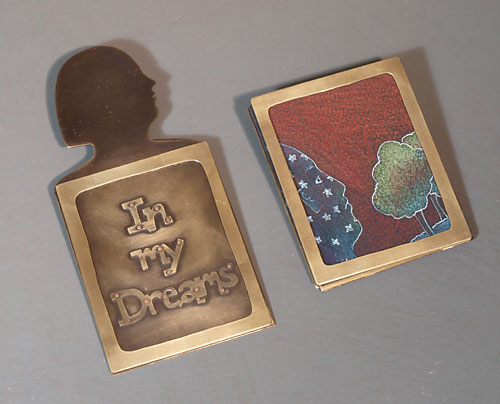
7. The cover and one page.
|
8. To make the hinges, solder a piece of 1/8 brass tubing to the edge of a piece of 20 gauge brass, cut it to size, file, clean off firescale, color to darken. (I'm surprised how long it takes to make the hinges.)
After the sections are cut to size, hinges are created by sliding a smaller size tubing through the opening. This acts as the hinge pin.
PAGE: 1 | 2 | 3
|
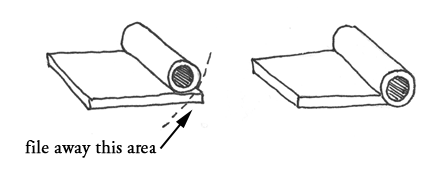
8. Make the hinges.
|
|
|